Lesson 5: Make a background blurry – a step-by-step Photoshop CC lesson
$4.99
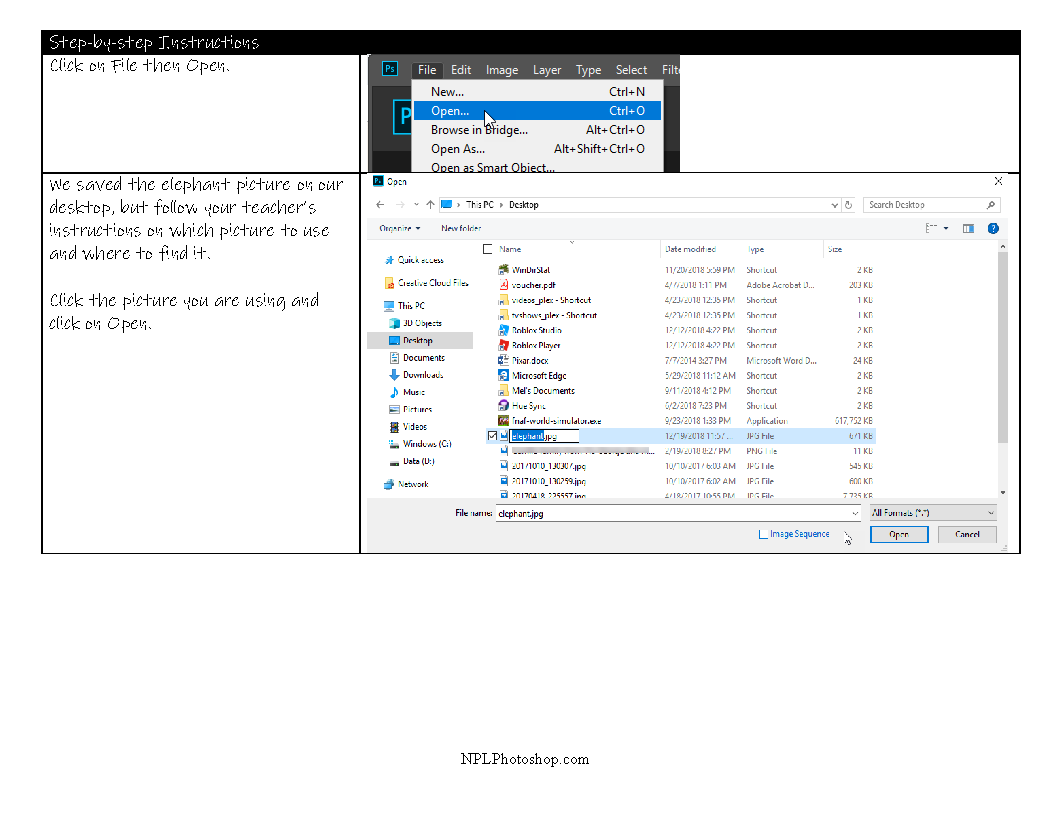
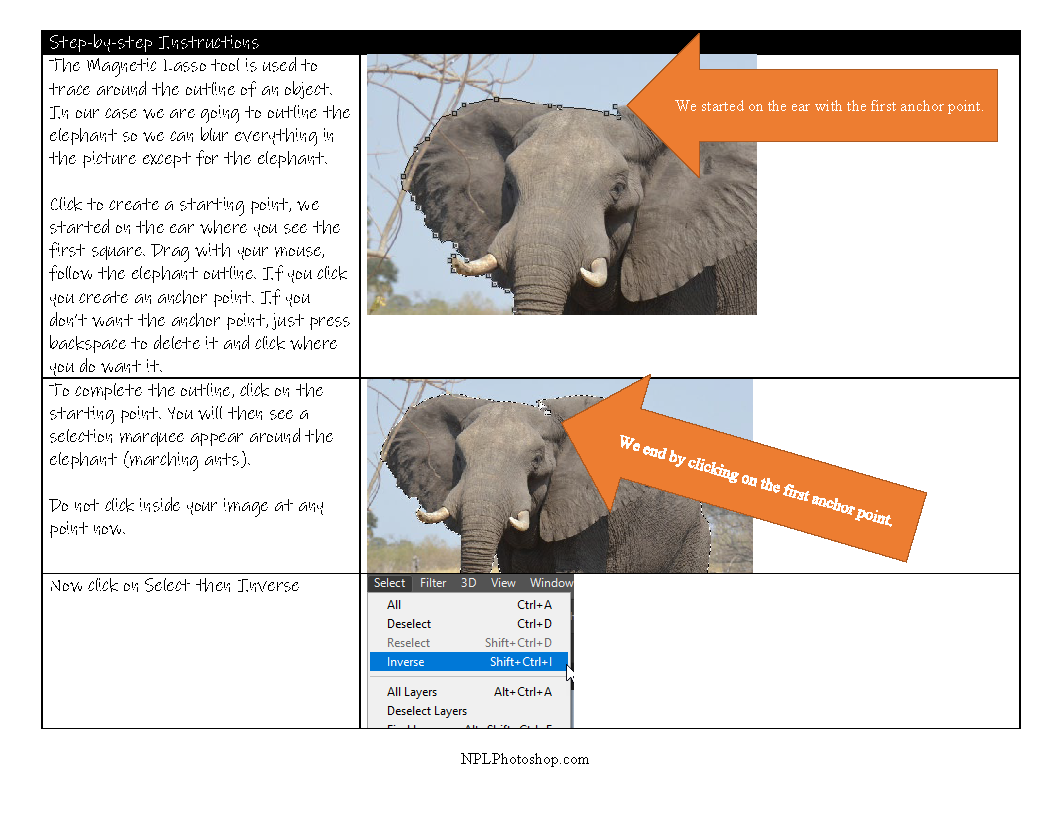
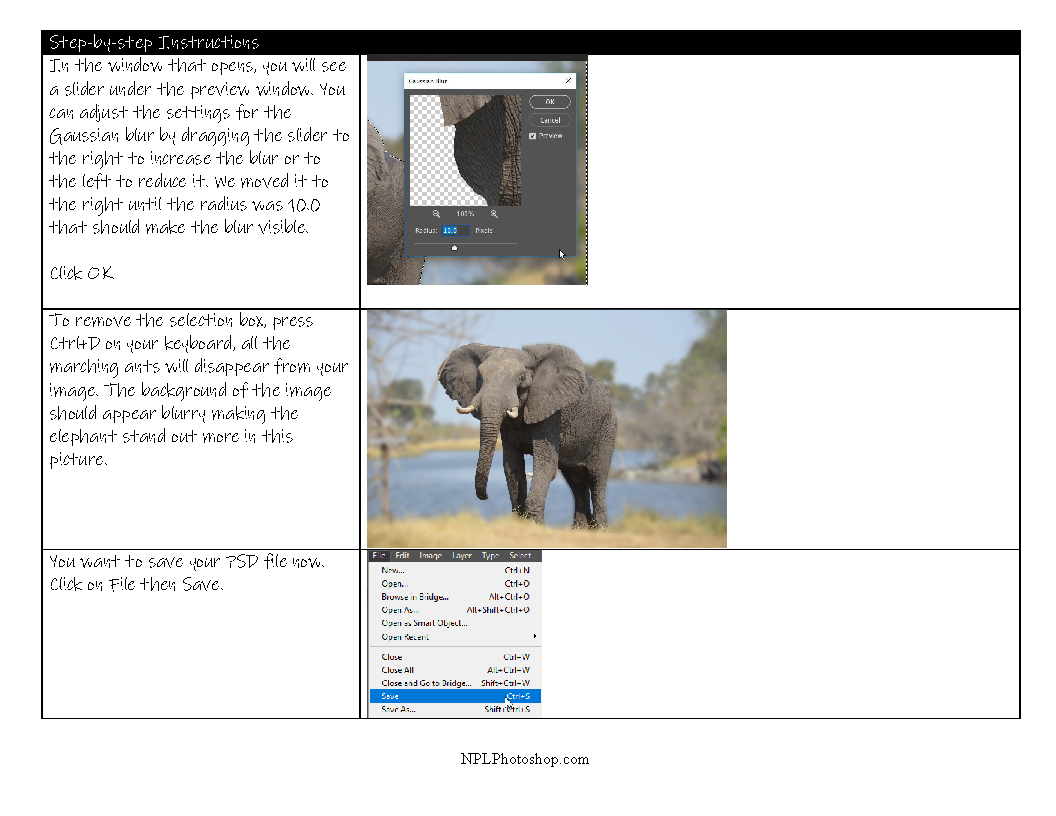
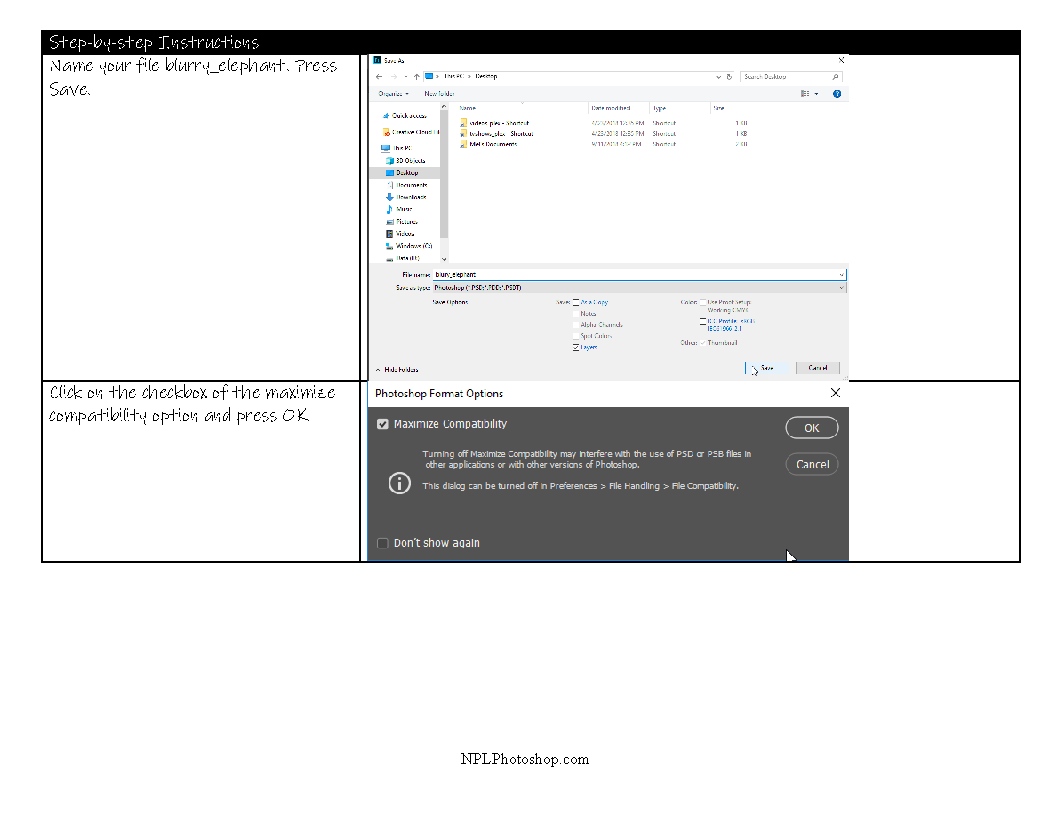
Your students will use the blur filters to blur the background of an image and make an elephant stand out in the foreground. You get the elephant image and a PDF with 8 pages of instructions, the elephant image, a completed PSD file to show your students, and a challenge activity so your students practice independently.
Want a discount? Become a member by purchasing Free Membership!
Make a background blurry – a step-by-step Photoshop CC lesson
Your students will use the blur filters to blur the background of an image and make an elephant stand out in the foreground. You get the elephant image and a PDF with 8 pages of instructions, the elephant image, a completed PSD file to show your students, and a challenge activity so your students practice independently.
All our lessons for high school students: *Are ready to use onscreen or printed *Are reasonably priced *Contain text instructions with many step-by-step screen shots *Emphasize skills needed for the technology workplace
Contact me if you have suggestions or questions about my products: migbos12@yahoo.com
In this lesson your students will use the Marquee Tool to create a background image and use the Warp Tool in Photoshop CC. The jist of the lesson is that they are using the Single Column and Single Row Marquee Tool to create a type of hash pattern that can then be used as a background. Once that is finished your students will bring the same picture back and warp it to give a stylized look to the image.
Your students will review the use of the Single Row Marquee Tool and the Single Column Marquee Tool, the transform command, blend modes, the warp tool and layers with this lesson. You are going to use an interesting picture to create a background. You get the universe image shown, a finished .PSD file and a PDF with 11 pages of instructions and a challenge activity so your students practice the skills individually.
This is a three (3) page handout with basic instructions needed to complete a Photoshop Computer Hardware Project. This is not a step-by-step lesson but rather a practice activity with some pointers that can be completed with any version of Photoshop.
Your students will create a “flyer” that shows an open computer with labeled hardware. They need to research computer hardware as well as find images and then create the Photoshop image. They will also research the 10 hardware components and look up pricing for each to include in the student chart.
Learning Photoshop Layers – a step-by-step Photoshop CC lesson
In this lesson your students will practice creating an image with layers using Photoshop CC, you get a 10 page PDF file with step-by-step instructions.
Lesson Objectives:
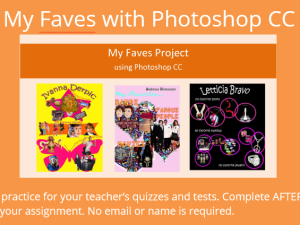
1. Insert three shapes into your document using the shapes tools.
2. Add your name and label what your 4 favorite things are for each shape.
3. For each shape you will add 4 images that demonstrate things you like.
4. Each image should have the background removed using the magic eraser tool. Use the eraser tool to remove stray marks.
5. Use the move tool to drag the shapes and images within your new canvas.
6. To resize the pictures or move them on your canvas press Ctrl+T then use the resizing handles.
7. Press Ctrl-+ to zoom in the picture you are making, or press Ctrl – – to zoom out